The first four posts on cell phone flower photography addressed tips on taking the photos. This post will focus on editing the images.
Why Edit Cell Phone Photos
If you have been following along on this journey you know that this series of blog posts was inspired by a workshop I did for the Montgomery (AL) Federation of Garden Clubs. They host an annual photography competition in connection with their flower show. The participants are mostly amateur photographers who use their cell phones to capture images of their beautiful flowers. The workshop was designed to help them take better photographs with their cell phones. With that in mind, the editing of cell phone images will help participants enter the best image possible.
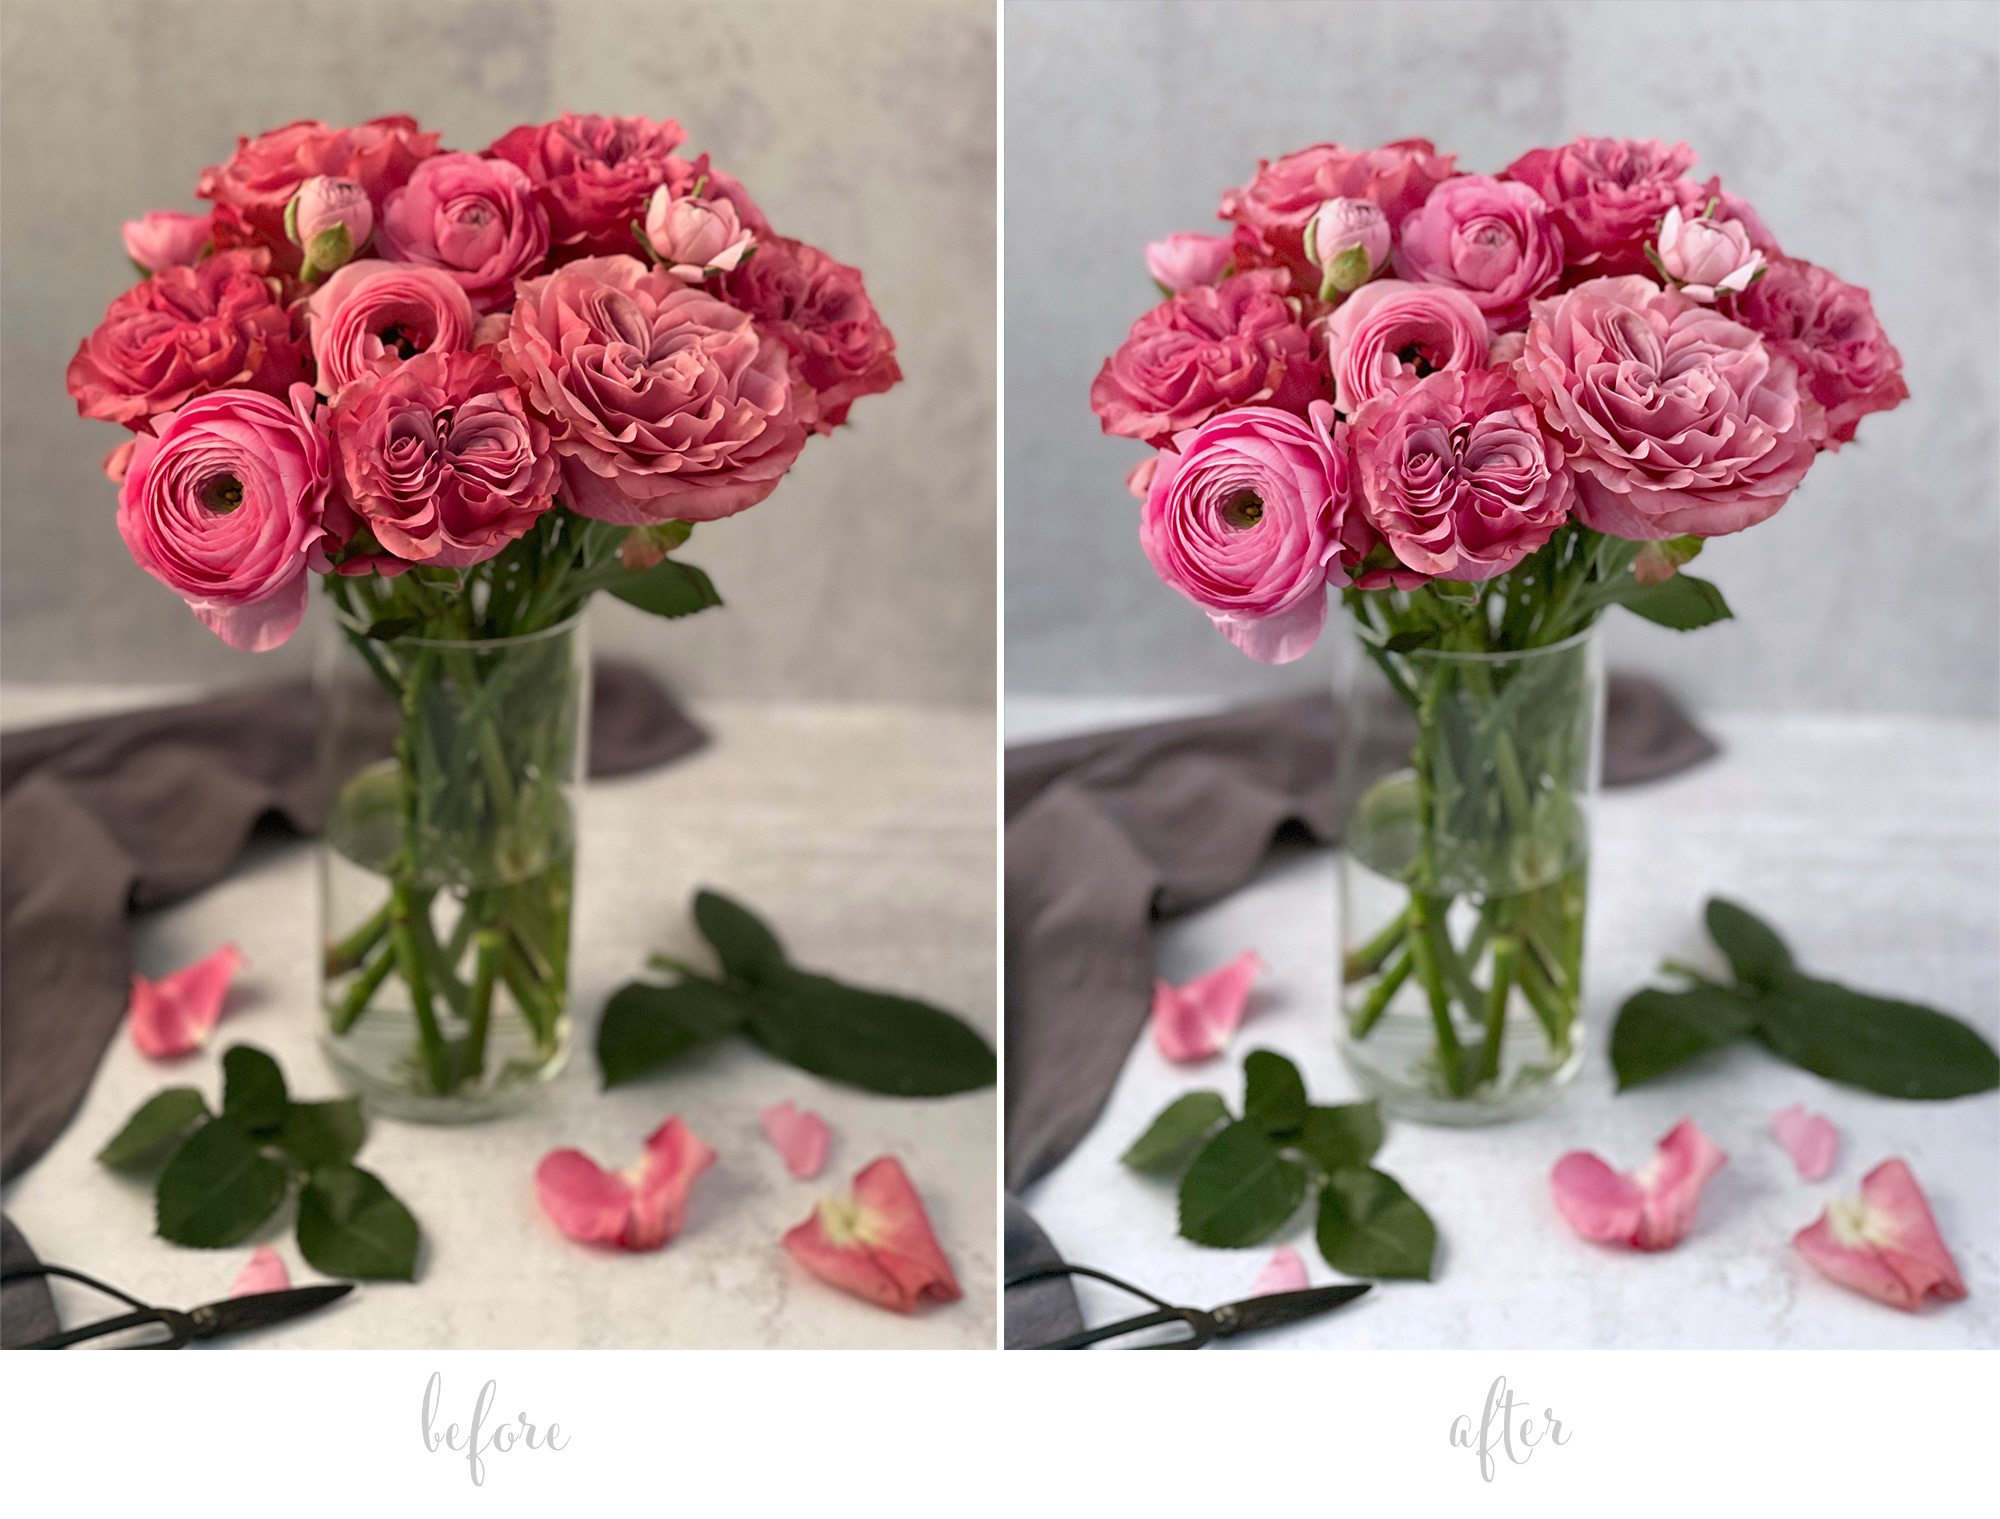
Here’s an example of an image taken with the iPhone 12 Pro Max before and after editing.
There are mainly two reasons I pull up the editing apps on my iPhone.
1. Adjusting exposure
When outdoors it is very difficult to check that your exposure is good. Couple that with the differences in screen brightness from phone to phone and the margin for error increases greatly. If the image is important and exposure needs to be spot on it is best to pull it into a third-party app that will allow you to view the histogram.
What is a histogram?
In photography, a histogram refers to a graph that shows you the distribution of light in an image. By looking at a histogram you can easily see if an image is over- or under-exposed.
There are many apps available to edit images in the cell phone. I will only mention two and show you how to find the histogram of an image and make needed adjustments.
Snapseed
Snapseed is a free photo editing app developed by Google. It is an excellent app.
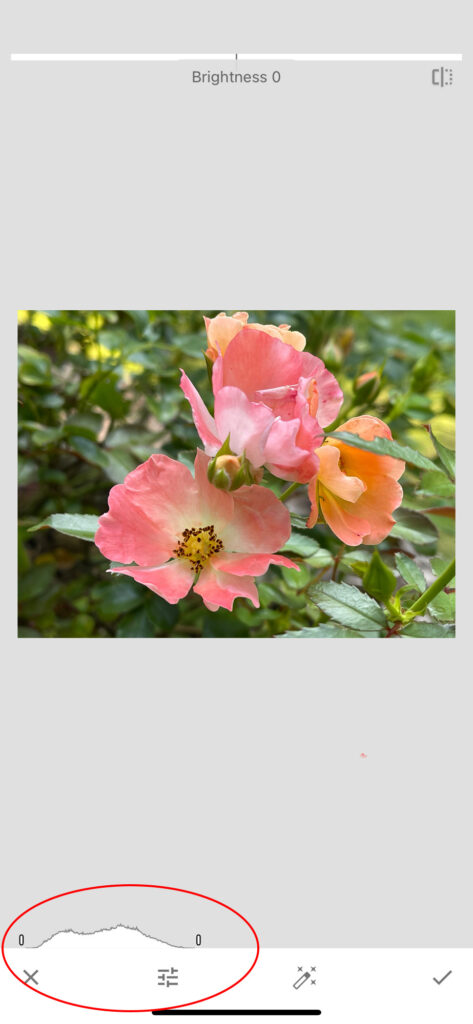
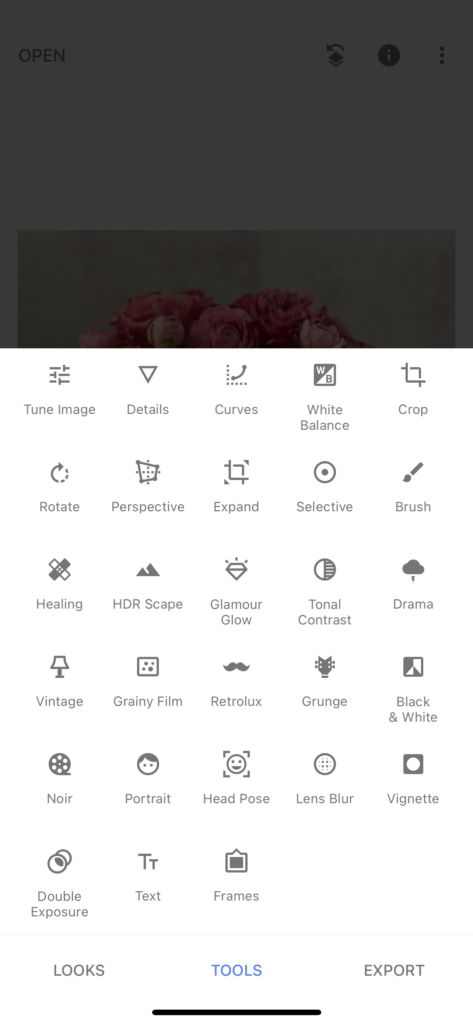
Open the image in Snapseed, tap on “Tools” and then on “Tune Image” the histogram can be found on the bottom left of your screen:
If adjustments need to be made click on the sliders at the bottom of the screen and several options will appear.
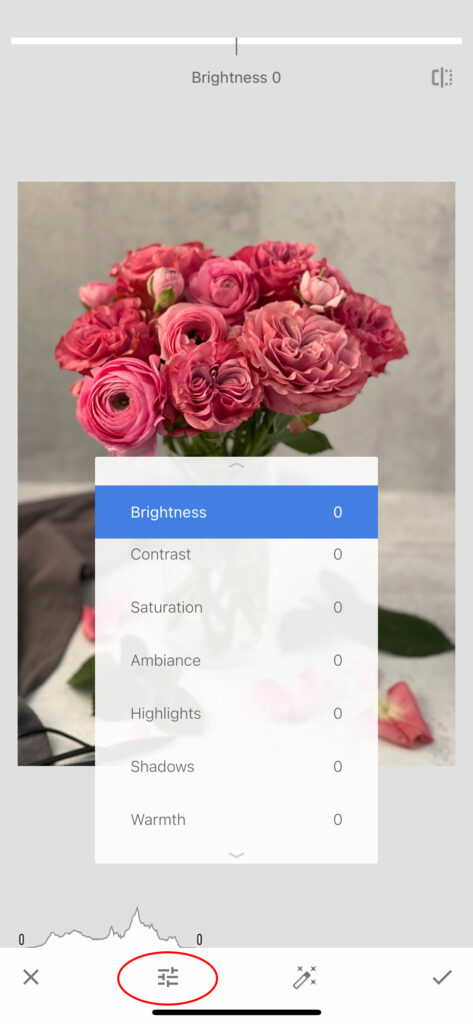
Click on the adjustment(s) you want to apply to the image. The options will disappear from the screen. Use your finger to slide to the right or left to make the necessary adjustments:
- Brightness Swiping to the right brightens the photo, while swiping to the left darkens it.
- Contrast Swiping to the right increases the contrast, while swiping to the left reduces the contrast.
- Saturation Swiping to the right increases saturation, or vibrancy, of the colors. Swiping to the left decreases saturation. A value of -100 will result in a photo completely without color. As a general rule stay away from adjusting the saturation of an image. New photographers tend to oversaturate an image.
- Ambiance The Ambiance control is a special type of contrast that controls the balance of light in a photo. It can be used to balance backlit photos or to accentuate contrasts throughout your photo. Swipe right for photos where the subject is darker than the background. Swipe left to increase the contrast of dark objects and create a slight glow around darker objects. This is especially helpful in photos that are slightly flat.
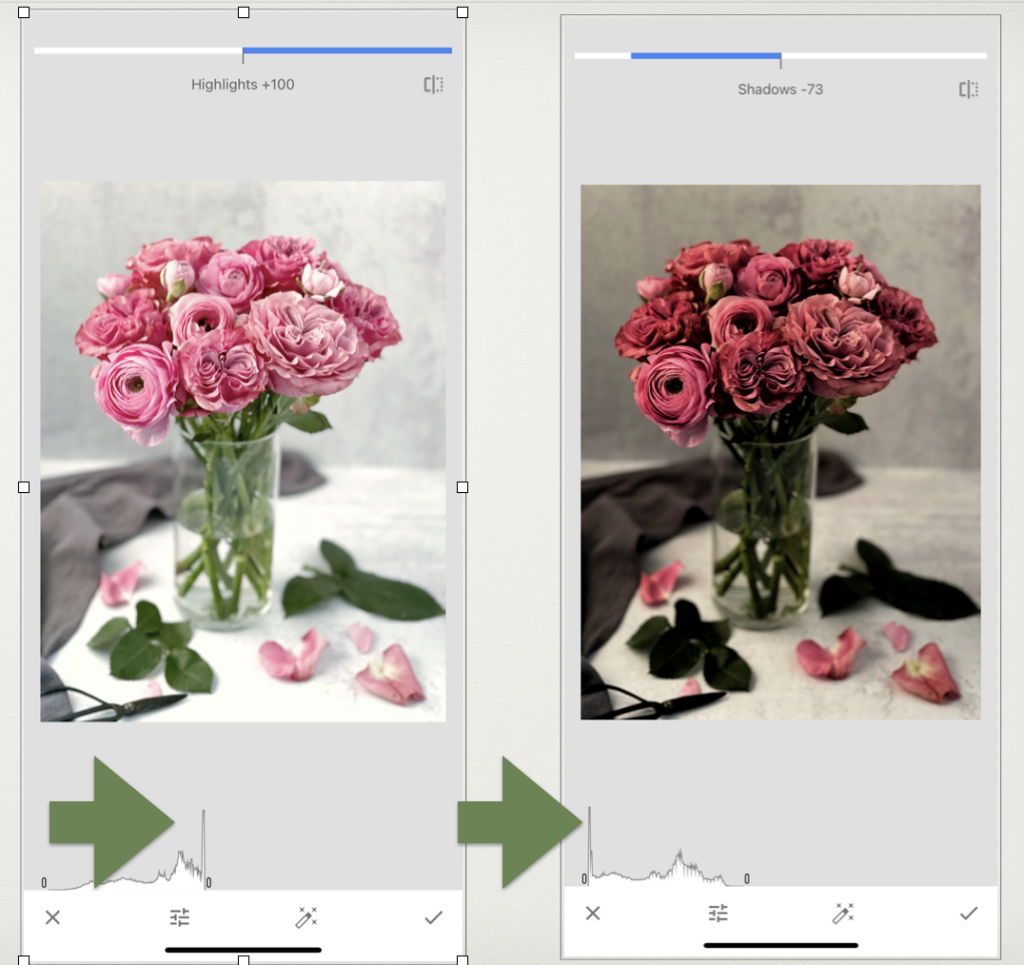
- Highlights IF there is enough information in the brightest part of your image you can use this to decrease the brightness of the highlights. Or brighten the highlights.
- Shadows IF there is enough information in the darkest part of your image you can use this to increase or decrease the light in the shadow area.
Lightroom Mobile
Lightroom Mobile is also a free app but comes with more bells and whistles if upgrading to the paid version. I think LR Mobile is a little more difficult to learn. For anyone already using Lightroom it’s not, but I can imagine it would be a bit overwhelming to someone new to photo editing on the cell phone.
There is not enough difference between the free and paid version to justify the price of the upgrade for an amateur.
When you open your image in Lightroom Mobile, the histogram will be at the top left.
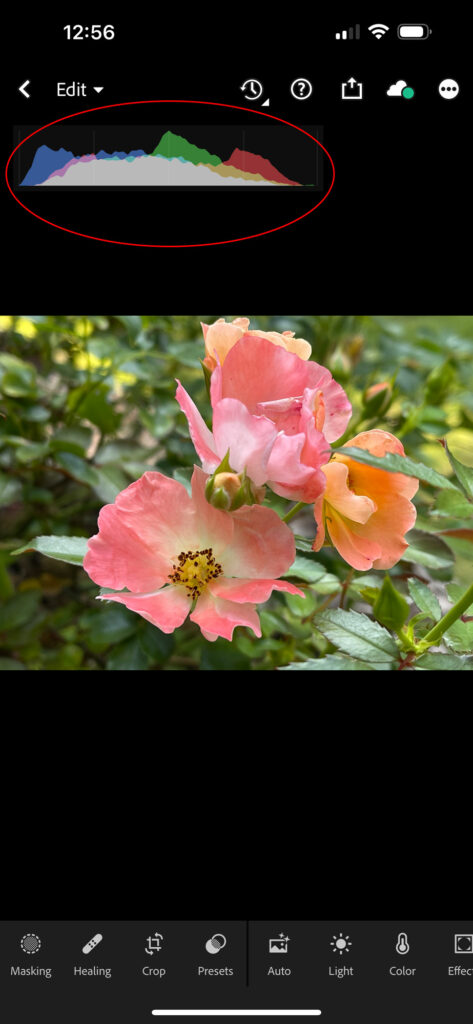
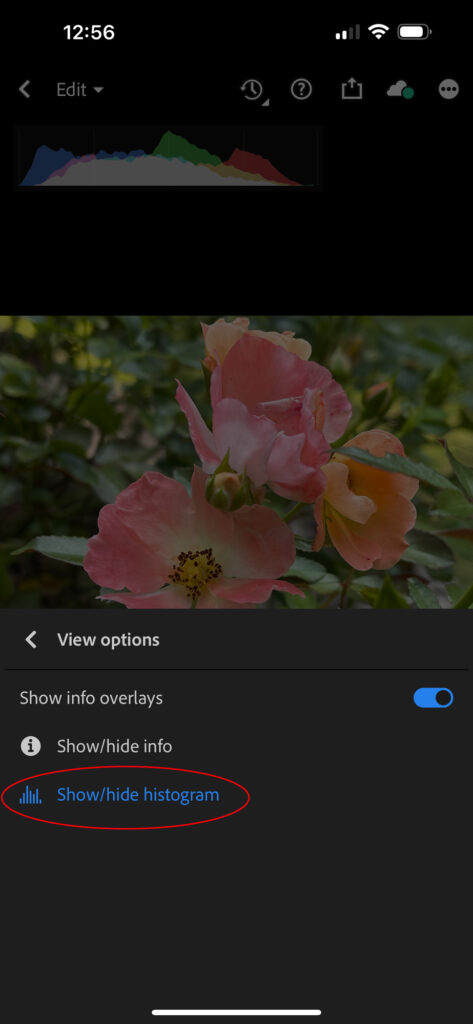
The thing I really like about the LR histogram is that it shows you the different color channels as well as the overall exposure. Since red and yellow are the easiest colors to blow out, you can easily see if those particular colors are okay and avoid pushing your exposure to the point where there isn’t any information in them.
The exposure settings are under the sun icon (Light) and work very much like what we covered in Snapseed.
2. Adjusting White Balance
The second reason I will pull an image into a third-party editing app is to adjust the white balance. Simply defined, white balance in photography means the colors in the image look natural.
I know this is a cookie instead of a flower but it perfectly illustrates the point.
My house backs up to a wooded area. In the winter I can photograph in natural light by the window in my little home studio with no problem. In spring, when the leaves start to come out and everything turns bright green, the camera starts to read my whites as having a green cast. The “before” image is what my camera saw and interpreted as correct color. The “after” image shows how it should look.
Photographing your flowers in natural light indoors or outdoors will result in some of the same color shifts at times. If you’re photographing a close-up even your clothing colors can create a color cast. That’s why you’ll always see me dressed in a neutral color when I’m photographing.
Snapseed

In Snapseed, click on White Balance in the top row, click on the dropper tool and move it to a white or black space on your image. If there is a neutral gray area that is good to click on, too, but you need to be careful about grays — some have a purple cast and some a green. Just move the dropper around until the colors look accurate.
The sliders may also be used instead of the dropper tool. You can adjust the temperature: moving the control to the left will cool the image, making it bluer and less orange/yellow. Moving to the right will warm the image, making it more orange/yellow and less blue. To adjust the tint, move the control to the right to increase the magenta and to the left to increase the green.
Lightroom
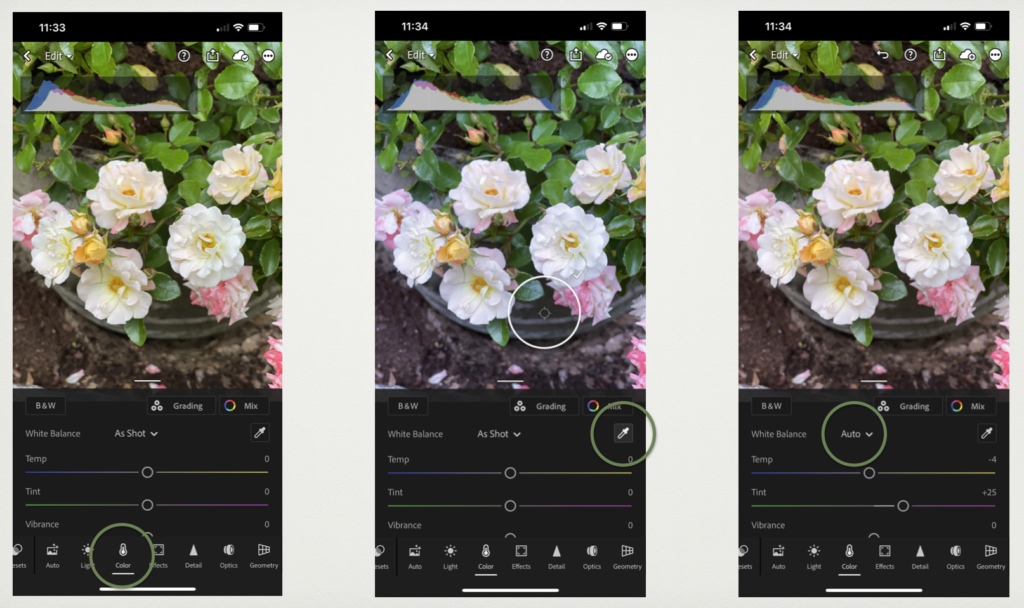
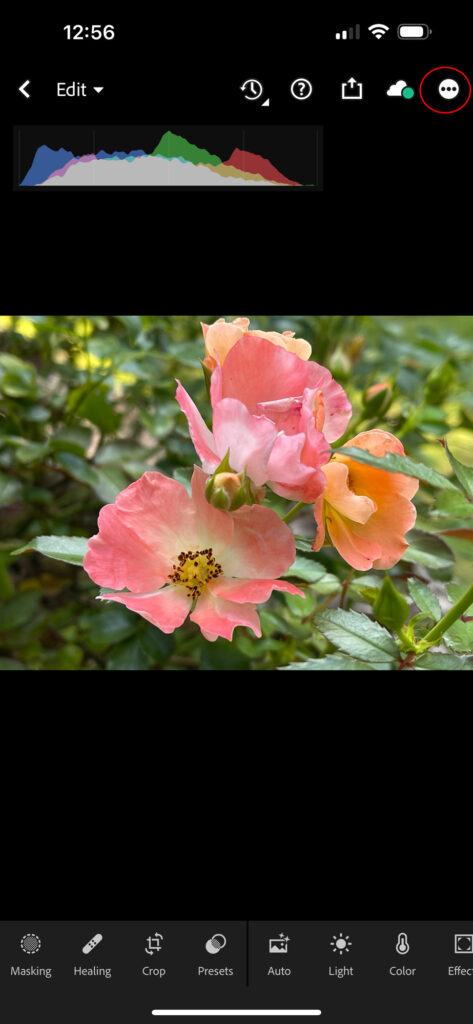
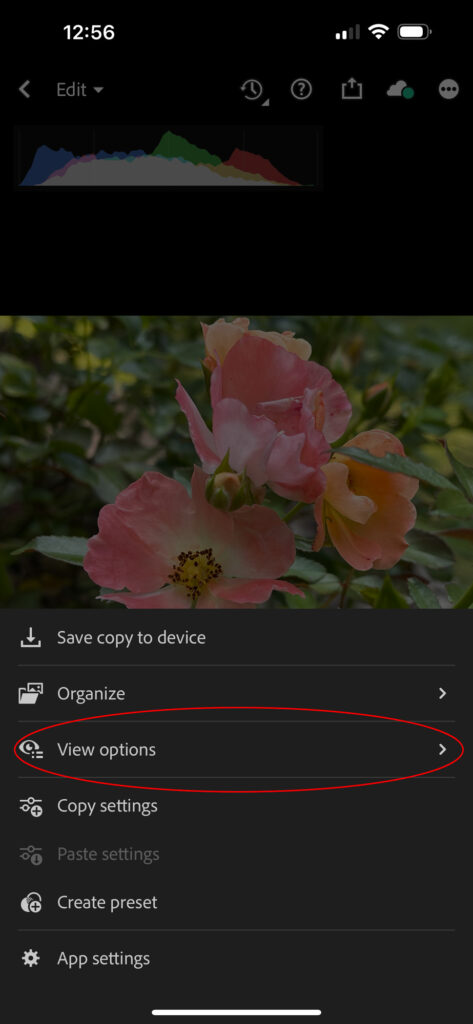
The controls in Lightroom Mobile are very similar. Click on the Color Icon to open the White Balance controls. I always try the “auto” option first. If it doesn’t take care of the issue I use the dropper to find a white, black, or neutral gray area in the image. My third option is to adjust the Temp and Tint sliders manually to achieve what I believe are accurate colors.
More Editing Information
Wow! That seems like a lot of information for two basic edits! However, it doesn’t nearly touch on the editing capabilities of the native camera apps or the third-party apps mentioned. Here are links to help you explore more:
Snapseed: https://www.photoworkout.com/how-to-edit-photos-in-snapseed/
Native iPhone Camera App: How To Edit Photos On iPhone Using The Built-In Photos App
Native Android Camera App: https://support.google.com/photos/answer/6128850?hl=en&co=GENIE.Platform%3DAndroid
Lightroom Mobile: https://www.bwillcreative.com/how-to-use-lightroom-mobile/
Thank you for hanging in there on this long post! The final post in this series will be available soon and will cover printing your image.